Tina's Twin Bommies

Ok the Tank is here. Please ignore my nasty carpet, that will eventually go, but am waiting for other work to be finished first.

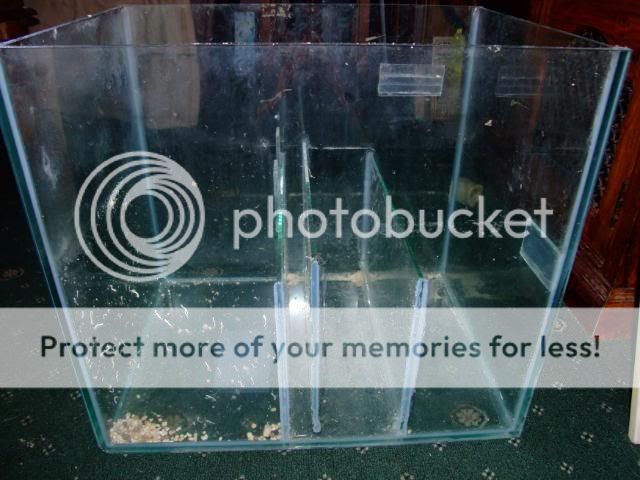
Some pictures of the sump

2009_0509nanoreef0002.jpg


2009_0509nanoreef0003.jpg


Can anyone work out how the flow goes through this for me??

I am a little stumped.


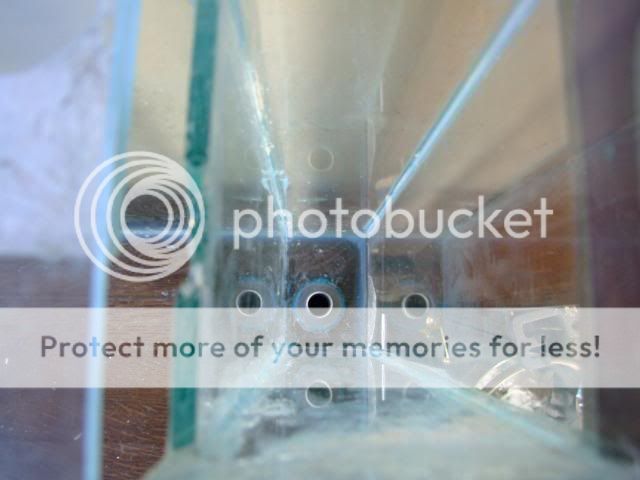
Next the pre drilled hole complete with bulkhead, need to try to measure this.
2009_0509nanoreef0004.jpg


A pic of the tank

2009_0509nanoreef0006.jpg


Another question.

The weir is see through glass, I am going to use tile paint to paint the back of the tank, can this be used inside the tank to paint the weir, or would I need to cover it with coloured acrylic??
 
No its the angle I took the photo at, there is about 1" gap underneath, the silicon goes a little further down.

As I say I am a little baffled :rofl: sorry its late.
 
Hmm, I guess looking at the side on pic, in flow is on the left, return pump over on the right!! The running water level would be just flowing over that first baffle, being so tall could be a safety measure incase of power fail, plenty of room for some filling up lol (although a fair bit of potential extra volume lost)!!

That's my guess anyway :)
 
I am not sure, there are another couple of bits, I asked the question in Satwater hardware, there is another piece of glass that looks like it goes inside somwhere and what I believe is a lid.
 
See Hardware Section Tina for Sump reply
You will also need some pipework etc to make the Durso for the main tank (You'll need to ascertain the bulkhead size for this)
So a few measurements will need to be taken
You will need
Pipework (size to suit bulkhead)
1x Tee piece
1x 90 degree bend
1x End Cap
Solvent Weld Glue

Picture425.jpg


Picture424.jpg


The 90 degree bend will sit over the weirbox wall where the notch in the glass is
and all pipework will have to be joined with Solvent Weld Glue. This stuff sticks like a dead pig to tarmac so you'll have to be quick when joining your pieces.
First of all get the measurements and cut all the pieces, fit them together in a dry state, see if they all fit nicely in the weirbox. (TIP- make sure your pipe cut ends are clean and free from swarf)
Set your durso on a table or such like mark on each intersection (join) a line with a marker pen. Apply Solvent weld glue to both pieces to be joined, Place the two parts together twist the lines to a quarter turn apart then twist back so that they are aligned again, perform this motion pretty quickly as the glue actually melts the pipe to form the seal. Once set you will not be able to get the thing apart so make sure all your measurements and positionings are correct beforehand.
Dont Glue the top sections to the standpipe just yet (from the Tee piece up) to see how the fill levels are in the main aquarium. (Leave the End Cap off at this stage) Fill the aquarium and set the thing in motion, Set the top sections on and see how this effects the water level, if everything is working fine the drain a little and weld the top sections in place. Never weld the End Cap on. You'll need this to adjust your air intake.
When set up...it may well be a bit noisy, (gurgling sounds due to air being dragged down the tube as the water overflows) this is typical of single pipe overflows, there are various methods to address this but we'll speak about those later when we get to the actual running of the Durso
I hope this was of some help to you
Regards
seahorse1-1-1.png


PS. Solvent Weld Glue gives off fumes so please have the room well ventilated if you decide to go ahead with this project.
 
outlet_strainer.jpg
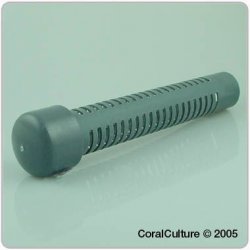
You might want put a Strainer on the Durso as well if the intake is going to be inside the main display tank and not in the weir, you don’t want any :fish: or corals getting sucked down that thing :no:
 
Okay, I now really need to get my ###### into gear and sort out this plumbing.

3 weeks on Saturday, I am off to Turkey for 2 weeks, I need to leave my mum in charge of the tank for this time. My thinking is that the greater body of water will be more stable for a complete novice like my mum to top off and feed for me. I am petrified to be honest, but the other half has been working 7 days a week now for about 4-5 months with a rare day off and only 1 week in that time. He is exhausted as he has been working around the house when not at work.

So Questions.

Can I use tile paint to paint the glass weir inside of the tank (am using it to paint the back on outside)?

The strainer that John'o showed above, where exactly does that fit?

Should I use a ball valve on the output of the tank to sump in order to switch off for maintenance?

I do not want to use the UV full time, however, where should it go, does it get plumbed into the return pipe?

Is there anything I need to know about leaving my mum in charge, is there something I am likely to forget to tell her to do? She always comes to lfs with me so she can always get advice there if needed.

What is the minimum feeding I should ask her to perform for the fish whilst I am away.

Should I do a large waterchange before I go?

I think that is about it for now, bound to be more later.
 
I have ordered plumbing supplies, 30lb sugar fine aragonite sand, and been shopping to lfs.

It took Andrew and myself all night last night to work out what size plumbing we needed and find an online retailer that stocked everything we needed.

I have also got some sealant, may need it but definately needed some for caves for the freshwater tank.

Got some more flexible tubing for the return pipe, and ordered a T piece incase I need to divert some flow from the pump (think I will).

I am hoping to get the plumbing done on Friday and fill the tank with the RO I have. I will then need a couple of trips to the LFS to get more RO to fill up on Saturday. Hopefully by Sunday I can do the switch over.

I need to see if the other half fancies cleaning the tank and sump out for me tonight or tommorrow first though.

I managed to find a few bits of reef bones at the LFS that were the type of shapes I am looking for, so will be able to make the two bommies when I switch. I also then want some smaller pieces of live rock that I will buy after the switch to fill bits in a little. Its in my head at the moment, all will be revealed when the photos are shown at or after the weekend.
 
Yeah dont forget the Pics Tina,
Lets us all see where your at with the setting up
ATB
seahorse1-1-1.png
 
Just to whet the appetite for the weekend, presuming my plumbing and sand order arrives tommorrow that is, here are a few pictures.

The tank has been religiously cleaned, I have installed the multiple extension leads and mom is bringing me some polystyrene tomorrow to go underneath the sump.
I could not find a shade I liked in tile paint around here, could only get International not Ronseal and I did not like the blue. I decided to go with tank backing, and went with blue this time.

2009_0514Reef0019a.jpg


2009_0514Reef0018a.jpg


Looks like the shelf has been cut at some point to house an external filter.

2009_0514Reef0022a.jpg


2009_0514Reef0021a.jpg


I am sure you will agree it looks sparkling compared to the earlier pictures.

My rock is soaking, alot of bits have come off it in the process. When I fetch more water on Saturday (may get salted this once) I am considering getting some small pieces of live rock as there were a few there on Wednesday and some LR rubble to go in the sump.

All of this is dependent on the delivery of course, without plumbing supplies, I cannot do a thing.

PS My desk on the left in the first picture looks orange, it not, it must be the flash.
 
looking good. that tank has come up a real treat.

once the plumbing gets done thats when things will really kick off.
one quick tip, don't glue any plumbing together until you are certain that is how you want everything to be!
solvent weld glue cannot be undone!
 
Thanks for that Rob, no it will take me ages before I have the guts to glue them together, will be triple checked and quadruple checked first.

Cheers Seffie, all I used was a capful of white vinegar in a bucket of hot water, and a little elbow grease, then rinsed it and dried it to a polish with kitchen towel, exactly how any glass in my house gets cleaned (apart from a little bicarb of soda on stubborn marks). It helps with the weir and sump that I only have little hands and arms else Andrew could not have got his hands in there.

It looks as if the weir has been added at a later date and the siliconing of it was not the best. Andrew religiously got any excess sealant off with a blade as he would have seen it from his sofa position. I can never get him to do this much for me on a freshwater tank, because it was him that demanded I have a Marine tank in the first place, I can get him to do pretty much anything.

It is also worth noting that this is the longest I have ever had a new tank sat in my living room before having it set up. I am sat here now patiently waiting for the doorbell to ring with a delivery for me.

This time though, the tank is right next to my seat on the sofa and right next to my desk, means that wherever I am sitting in the room, I will be able to see into the tank.
 

Most reactions

Back
Top