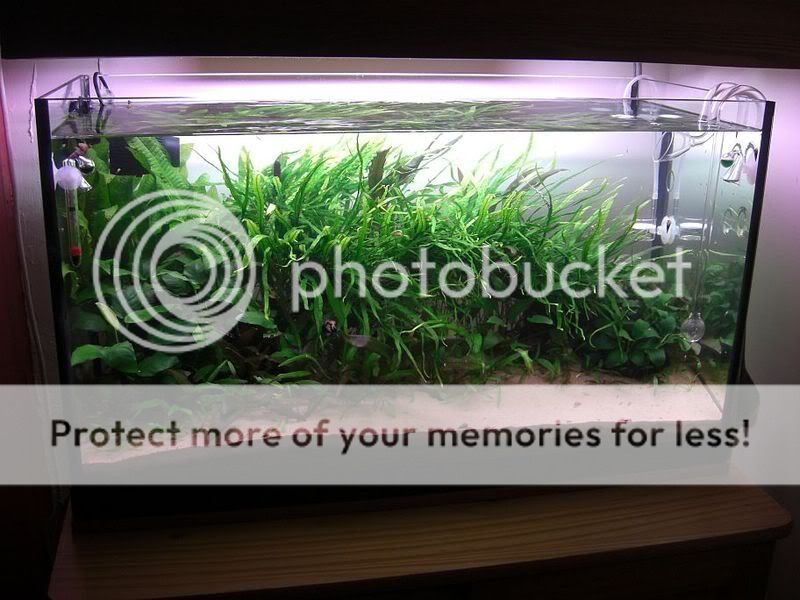
Diy Whole Tank Led Lighting Retrofit

Looks good. :good:

Any chance of a snap of the old floros over it before one of the LED's, just for comparison?

All the best
Rabbut
 
Old lights - 30W 4500K T5HO + 18W 6500K T8:
lightsinhod.gif


New lights - Approx 42W 5500K LEDs
compboardfitted.jpg


Old Lights - lights 4-6" above water
front3.jpg


New lights - lights 12" above water
comp5.jpg


AC
 
Wow, great work, very interesting.

For a proper comparison shot, try playing with the camera until you can match the same ISO (200), aperture (f2.8) and shutter speed (1/25 second) as the pic with the florescent lights :good:. This should give a decent idea of the increased brightness.
 
Impossible to do that with this Camera. lol It is a Casio Exilim EX - Z1050 10.1Mp.

I can change the ISO but not aperture or shutter speed.

These were just taken on auto with the flash turned off and the white balance set to daylight flourescent.

You can see from pics 1 to 5 the camera is correcting the light as the more light comes on.

AC
 
I should say that I would not have gotten this done without the help and advice I have received on here and on UKaps so thanks have to go out to Apstys, Rabbut, SteveyG, SmithRC, Binksy, Schmill, Scottturnbull, Rooster and everyone else who has helped me get this right with no knowledge behind me. I was taking advice from several sources on this one so that I didn't end up following the wrong path ;) Group hug time here 8)

:yahoo: :thanks: :good: :friends: :drinks: :cool: :clap: :clap: :clap: :hooray: :thumbs:

AC
 
Andy,

I'm glad if i have been a help to you in any way on this project.

I think you have done an amazing job, and your final product looks great.

Well once i get some cash together i be looking into this for my 2ft tank, looking at the brightness of those 3w i may well think about trying the 1w versions.

Cheers Gordon.
 
Gordon. As its so much more work wiring and setting up and soldering etc I would go for max with 3W and then setup so you can raise and lower the light.

If you decide to upgrade in the future its not just buying new ballast and tube etc. Its take out the old wiring/drivers/LEDs (virtually unsaleable) and starting the whole process again.

Raising it gives you the ability to higher/lower the lights and therefore the intensity therefore you could do a lowlight tank for a year and then lower the lights and do a high light tank etc.

Lot of hassle if you're not happy with the lower lighting once you've done it.


I have to add to my last post that after 3 days the substrate is quite visibly much darker than with the fluoros in :(

Gotcha there. 3 days of this light and my needle ferns went mad and are blocking out loads of light at the front :)

I guess that gives an indication on PAR values at the top to middle of the tank (where the needles are situated on the wood.)

Therefore I have raised the lights up a further inch to reduce light a little and will have to prune back the needles quite substantially.

The Corys are absolutely loving the shimmer/ripple effect on the substrate. They are much more active than previous!!! I think this must be much more natural to them.

AC
 
I'm going to try the spare LEDs tonight and see if I can replace the 'odd' 4 in the hood.

The odd ones will be OK over my Nano when I do that :)

AC
 
I replaced the 4 odd lights with spares tonight and all went well. Won't make much difference within the tank but was niggling me each time I saw them out of the corner of my eye. lol

there is still one in there that is slightly different but not enough to warrant removing it.

AC
 
Looking good Mate :)

Great to see a start and a successful finish to a project :)

I really need to try and do something like this - just to keep my hand in :)

I might have to pick you brains in return at some point :)
 
If you pick my brains you'll be getting SteveyG and Rabbut's advice via chinese whispers from me. lol

I'm sure you'll go for something a little neater than 7 plugs to run it. ;)

Did you see your cold cathodes still going strong?

AC
 
Onto the Nano luminaire now. All finished in a total of about 6 hours of which most of that was spent on making the luminaire (and then getting a little carried away decorating it :lol:)

So here is the unpainted, unfitted luminaire on top of the nursery Nano (which I made out of an old window last week :))
The base panel where thelights will be is 6mm clear acrylic and the sides are 2mm. Again was somethng I had lying around. An old leaflet holder that my Dad brought around with a load of scrap wood that I made my shed from ;)

luminaireplain.jpg


The lenses on the Stars:
lens1.jpg

lens2.jpg

lens3.jpg


Then a star fixed to heatsink. I have used thermal compound because I had some from when I removed my PC processor during a problem period. I then superglued over the edges of the star to stop it 'sliding'
heatsinked.jpg


The lenses glued and then siliconed into position inside the luminaire. I wanted to actually fit the lenses into the holes but this acrylic is quite hard to cut perfectly and therefore I decided to fit these above the holes. If I do the main luminaire like this I will use wood because it is much easier to do these sort of holes and then I can fit the lense flush with the surface within the hole.

you can see how carried away I got with the decoration now. lol. Aluminium car spray, then some decals from a bike, then gloss enamel spray to finish it (all of which I had lying around)
lenseseal.jpg


And the lenses viewed through the holes:
lenseholes.jpg


Testing it viewed from below:
tes1.jpg


And an idea of the brightness of 3 LEDs. The floor below is about 3ft from the LED. The water in the tank this is going on will be about 6 inches below!!!:
tes2.jpg


And the finished article ready for the tank test!!!
finished.jpg


I will do a comparitive test of the light with and without lenses later although it won't be exactly scientific as I will 1 series of the main luminaire at the same height as this little luminaire for the 'without lenses' test. Therefore different LEDs and slightly different spacing but will give an idea of the difference between using and not using lenses.

AC
 
Very impressive, the amount of light is amazing.

Your really into your DIY lol.

Now do a DIY filter for the nursery .

Will be interested to see how plants grow in the nursery tank as that's DIY on a scale I might just manage if I have the time!
 

Most reactions

Back
Top