🌟 Exclusive Amazon Black Friday Deals 2024 🌟
Don’t miss out on the best deals of the season! Shop now 🎁
You are using an out of date browser. It may not display this or other websites correctly.
You should upgrade or use an alternative browser.
You should upgrade or use an alternative browser.
Builders Expanding Foam
- Thread starter Thedoctor
- Start date
markandhisfish
comfortably numb
wouldnt like to say but having used it before at work i dont think id like to risk it , plus its a pig to work with . how big do you need to make? you could try the polystyrene sheets /knife/blowtorch method . or aquascape epoxy maybe .
bullit
Fish Addict
i dont see why not but i think it would be easier to do it the polystyrene method myself. Definately something i want to try down the line.
tribalbrit
Fish Addict
- Joined
- Jan 12, 2011
- Messages
- 968
- Reaction score
- 0
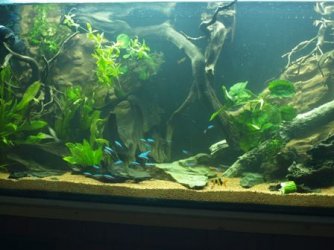
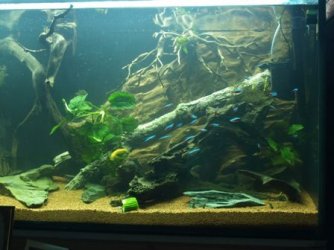
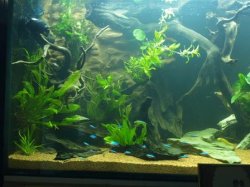
I've just made and fitted a 3d background in my 72"x22"x30"h
I purchased two 25mm thick pink styrene sheets from my local building merchants 600mm x 2500mm
I then cut this into three so that I ended up with four bits 600 x 700 (Internal heigh of the tank)then on one of the 600 x 700 bits roughly draw some rock shapes, leaving gaps between.
Cut these out and rough up the edges.
Then using a candle I carefully melted and shaped the rocks to remove the squareness.
Then glue these onto the other 600 x 700 bit again leaving spaces between. I used adheseal adhesive to stick one to the other, expensive but very good,and black.
Leave back from the edge a bit so you can silicone around when fitted..
You can also melt and shape the back piece with the candle if required to give an uneven surface.
Now because I wanted to build in my filter pipes to the background I cut them into both the back sheet and the underside of the rocks before fixing, I then covered over the remaing visable pipe(rigid) with expanding foam, this does not go where you want it so I over did it a bit and tried to make it look a bit like a branch shape..
Then when dry and stuck I covered the whole thing in an epoxy resin (available on ebay) and as this was tacking up I then covered the whole thing in kiln dried sand (block paving sand) again from the building merchants.
Leave to set. when set lift up and all the un set sand falls of and you should be left with a sand rock background
Leave for 48hrs or so and stick to the back of your tank Or/and sides with silicone..
I decided to cover about three quarters of the back of the tank leaving a space so that it looks like the depths of the river.My tank back is painted black
Dont leave any square edges to the styrene apart from those that fit to the tank ie; bottom side and top if you have the flat braces to the top.
Ensure room temperature is 75/80 degrees when using the resin or it wont cure corectly.. silicone all the eges when sticking in the tank.
Hope that helps
Gary
bullit
Fish Addict
any pics gary?
Thedoctor
Fishaholic
- Joined
- Sep 13, 2010
- Messages
- 484
- Reaction score
- 0
markandhisfish
comfortably numb
Considering options for Making own Background for Jewel 125 and securing 3D background in 5 ft tank.
Considering coating polystyrene in Silicon sealant then covering in Black moon Tahiti sand too, this sound better?
to fix a background in simply use aquarium safe silicone . . i cant remember who it was but somebody did a thread recently where they covered foam with silicone and black sand . the effect was really nice .
heres the thread http
 /www.fishforums.net/index.php?/topic/351030-diy-rock-retaining-wall/
bullit
Fish Addict
I ponder whether to use my builders stihl saw. I could cut the rocks so they are flat at the back and then just silicone them in place lol.
tribalbrit
Fish Addict
- Joined
- Jan 12, 2011
- Messages
- 968
- Reaction score
- 0
yeh I thouhgt about that but then went for the styrene option will take pictures tomorrow when camera is charged up 

Aqua Tom
Fish Gatherer
Builders expanding foam is nasty stuff if you get it on your skin, so i would say no to using it in a tank.
tribalbrit
Fish Addict
- Joined
- Jan 12, 2011
- Messages
- 968
- Reaction score
- 0
tribalbrit
Fish Addict
- Joined
- Jan 12, 2011
- Messages
- 968
- Reaction score
- 0
§tudz
A True Oddball
I wouldnt risk using expanding foam in a tank as it contains formaldehyde which will kill your fish...
I would look into getting a large styrofoam block, cut it to the shape you want and paint it with epoxy, this will seal it, then silicone it to the back of the tank, you could also cut holes and vents for heaters and filters to sit inside?
I would look into getting a large styrofoam block, cut it to the shape you want and paint it with epoxy, this will seal it, then silicone it to the back of the tank, you could also cut holes and vents for heaters and filters to sit inside?
Similar threads
- Replies
- 12
- Views
- 422
- Replies
- 33
- Views
- 1K


