Celestial Glade - 125ltr Low Maintenance

the tank looks amazing, filling in so great! and those black cories look great! it almost seems strange that the black is a bred colour for the cories, one would think that it would be natural, so you know what i mean?
 
I thought I would do an update as there have been some developments this week.

Firstly some bad news in that on Wednesday I noticed 1 of the Cory Schultzei floating at the top!! From people’s suggestions on planetcatfish it seems it could be a internal bacterial infection. The others seemed OK so I did a 10% water change and then left the tank as it was.

Then on Thursday I noticed one of the microrasboras at the filter outpipe. Must have been dead a couple of days as it was already half eaten. Maybe this was the cause of the cory dying?

Anyway have been doing a 10% water change each night and everyone else seems OK. Will keep on the daily water changes for another week and see how they go.

On the planted front I have made several changes to the equipment.

I have been having a few problems with BBA in the centre of the tank on the needle ferns.

Due to the increase of plantmass in this tank and a large quantity of it being ‘substrate free’ I have now doubled the original dosing. This is not because the original quantity was wrong as the tank was going along very well with that quantity for quite a while. Its just that as the plants have grown in so well they are now using the original amount very quickly and is probably the reason for the small algae outbreaks.

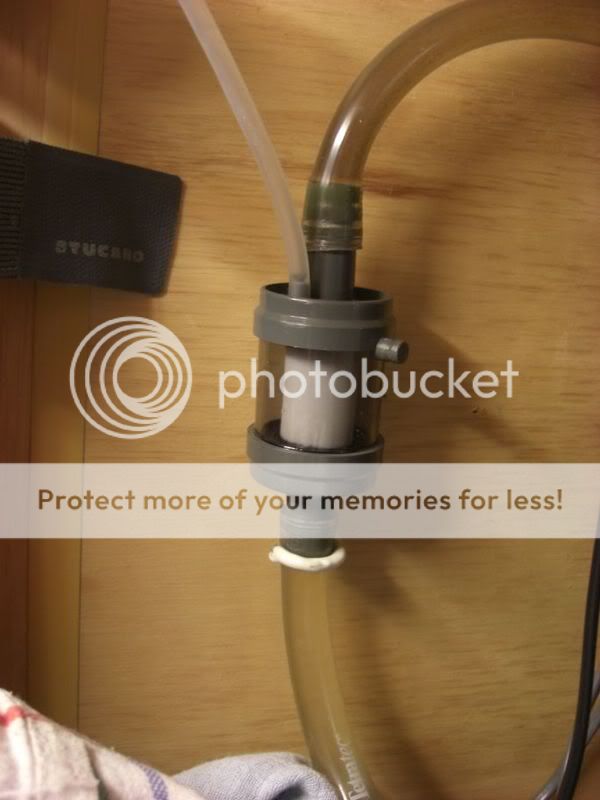
Firstly I decided to try out the Boyu inline diffuser that Zig has used in his mountainscape V2 scape. Its not because I’m not happy with the Rhinox. More a case of not having to clean it as often which was a bit troublesome because of the new position I had had to put it in as the plants have grown. I bought 2 as they are really cheap and that way I can swap them every couple of weeks.

Here is a pic of the diffuser in Situ:
diffuser.jpg


The initial observations were good. Very small bubbles, however this led me onto another debate.

I have been using glass in and out pipes for a long time and I started a discussion on wether these tubes due to their smaller intake capacity (the intake on stock tubes is a large strainer, whereas on glass tubes are small slits) and also that as they are quite thick they reduce a 12/13mm to 8mm. The screw on connector for hoses of course reduces the diameter but not as much. I decided to put the pipes that came with the filter in to see. This is the spray bar and intake strainer:
spraybar.jpg

strainer.jpg


There is a noticeable difference between the flow. Therefore I have decided to return to the spraybar and inlet originally supplied with the filter. The microbubbles are now blasting all over the place. I still have the powerhead in there but I may ‘trial’ not using it and just having the 6 x volume filter running.

Here is a front shot of the tank (picture in the daytime I’m afraid and with only the 0.9WPG on so the colour is a little pink.) I haven’t reduced the size of this picture as much as usual so that if you want you can take a much closer look and try and find the algae. Lol. (Its starting to look like one of LLJ's scapes. lol)
fullfront-3.jpg


So a week where I lost 2 fish and took 3 pieces of glass out of the tank. Heartbreaking but the fish seem OK and the circulation is much improved!!!

AC
 
Lush and healthy of course. I must add that I have changed the layout now too. lol. no offence, just the Spiralis was getting too long and I decided to go for the golden triangle. Now only two thirds looks like an LLj scape. Pictures when the water clears.

AC
 
A quick update.

I removed the balansae and Spiralis from the left of the tank and then put the Philippine Java in its place. I now have a triangle (or at least will have once the fern fills out a little more.)

I then planted 2 pots of Tropica Pogostomen Helferi where the Java was. As normal I have it differently to others. lol. I have a 'carpet' behind the front part of the scape an with the positioning of the tank in an alchove of mmy room it is quite hard to get a decent view from teh right where it is (I had a go and it is below.)

So onto some pics:

Full tank shot from the front:
fulltankfront.jpg


From the left:
artyleft-3.jpg


From the right:
right-1.jpg


And the Helferi:
helf.jpg


AC
 
I'm still on the never ending hunt for 30ppm alongside large plantmass and not any great success so far but I think I am getting there. Since the plants filled and filled more the DC has gone from lime - grass and these days hovers around the murky greeny blue area.

I wondered if my Ph kit was out of date and meaning the DC colour was off so I checked the Ph with some TetraStrips and it said 6.8. I checked with the AP liquid kit and it said 6.8. With my tap water reading 7.2 I have to assume that I am not injecting enough so bps out of the window (its going too fast to count!!!!) Never seemed to have these problems when I ran 24/7 rather than solenoid but I shall persist. lol

I have ditched the aesthetics. The Lily pipe and glass inlet are out. the glass diffusor is out. Lots of plastic is in and bubbles galore disturbing the view (which I don't really mind that much)

this is the setup I have settled on at the moment. This is the 8th combination I have tried this week. The powerhead is at the rear and runs into an old Fluval Internal filter spraybar pointing to the front. Just in front of the powerhead is the filter intake. At the front corner is the connection for the Tetratec spraybar with the spraybar removed. In the spraybars place I have put the powerhead outlet extension and deflector (trying to imitate Zig's ADA jetpipe setup a little here. lol.) The Boyu inline diffuser is back in place.
equip.jpg


This means the filter flow and CO2 bubbles blast out of the outlet which is angled downward slightly by the deflector. Then the bubbles get pushed downward in all directions by the spraybar. Any bubbles that try to get back to the surface are pushed back down again. In theory this should work really well as I can see bubbles everywhere (the preverbial lemonade tank at the mo.)

This is the DIY jetpipe setup:
spout.jpg


And a few pics of the bubbles:
bub1.jpg

bub2.jpg


Fingers crossed on this one. lol

Other thing is I have removed the 'test' Macrandra from the front as it was geting bent in two from the flow at the front. There are still stems at the back as you can see (one of at least) in this pic:
tank-2.jpg


Finally a couple of pics I managed to take of one of the Zebra Microrasboras:
zeb1-1.jpg

zeb2-1.jpg


AC
 
It looks first class the new scape is great. Those little rasboras are very little beauties.
:)
 
Get the beer out (as if I need an excuse.) The holy grail has finally been achieved. Don't know how the colour shows in the pic but it is a light green. I reduced the solution to 2ml to try and get it to react quicker. I have also bought a 'Chameleon' style DC for £3.50 inc. shipping and when it arrives I will put it in the other end of the tank.
DC-1.jpg


I love my glass. You can see in this pic the 'teardrop' DC. The Rhinox 2000 diffuser and the glass J pipe leading down to it. Behind the tank you can see the Gamba XII NRV and bubble counter combo. Finally the glass inlet and Lily pipe. You may say the DC is too close to the diffuser and therefore the green is false but the powerhead is in the left rear corner and blowing the bubbles to the right. No bubbles go anywhere near the DC!!! This should be at the end of the CO2 'circuit'. The new DC when it arrives will be in the other end so then I can see if the ppm is similar at both ends. Quite a lot of algae on the glass from the last 2 weeks messing about too.
glass.jpg


This is how the tank looks at the moment. You can't really see but there is quite a lot of BBA on the needles and Crypts in the centre of the tank from the 2 weeks of struggle with the CO2. Hopefully now its sorted and no more tampering this will diminish again. All deteriorating leaves have been removed.
front-3.jpg


This is a shot of the tank from the right. Not ideal the way my tank is positioned (in an alchove to the right of the chimney breast)to get this shot as my camera is leaning on the wall to the right of the tank.
right-2.jpg


And a picture of the Pogostemon Helferi. Not as green as Clives by a long way but also surprisingly free of algae after 2 weeks in the tank. Before you say I took the hood off the tank after taking the picture when I noticed how much rust had gathered on my paper clip fastening. Am going to clean the tubes and reflectors after this post is finished. lol
pogostemon.jpg


Finally another casualty last night. I noticed one of the microrasboras was at the top gasping and with me dabbling with CO2 I naturally though Ooh Nooo. On closer inspection I noticed she had a large 'tumor like' growth just in front of her anus area. 2 hours later she was wrapped around the powerhead intake and removed swiftly!!!

Thats 2 of the microrasboras now. Seems like they aren't quite as hardy as I thought or maybe just more susceptible to growth/bacterial infections than other larger fish.

AC
 
Huge change this week.

I decided the Pogostemon Helferi was silly behind the hardscape, barely visible from the front. Also the growth of the needle ferns was making the front of the tank very dim so I have moved some bits and bobs and at the same tank had a darned good clean.

First though I did change the CO2 diffusion again since the last post but it has been like this now for 6 days. Not a huge change, just that instead of it being in the open on the right and straight down I added an angled tube from an old knackered internal UV so that the diffuser is pointing in the same direct as the powerhead output. This means I can now fit it into the space behind the Philippine Java which should grow to hide it completely:
diffuser-1.jpg


So onto the work. First thing I did was to remove all the hardscape pieces. Only 3 so not too much trouble:
hardscapeout.jpg

As a sense of scale the bottom piece is 50cm long!!!

And this is what is left with no hardscape in (wahoo you can see some of the microrasboras. There are only 6 left of the original 12!!!)
tankempty.jpg


This is my clip on light when I am scaping as the hood is not there to supply light:
scapesetup.jpg


The main changes then are that I removed the pogostemon helferi from the rear corner. Then removed the Crypt Parva from the front right corner. Replaced the 2 left pieces of hardscape (not the long one) as they were. then I replaced the long piece but instead of it coming from the front right corner it is a lot further toward the back. I then added some Crypt Wendtii behind it. The Parva I removed was then used in front of the Wendtii (the whole length of the tank.) Finally I replanted the Pogostemon Helferi in the front right corner.

This is how it looks now:
junglefull.jpg


This is the left part of the tank. The front half of this side is complete and looks great IMO. Very full and an awesome mixture of shapes and colours, the Philippine in the rear needs to fill out to complete this side:
leftfinished.jpg


And this is the Pogostemon on the front right:
righthelf.jpg


And although its not incredibly visible the Wendtii will get taller here at the back:
wendtii.jpg


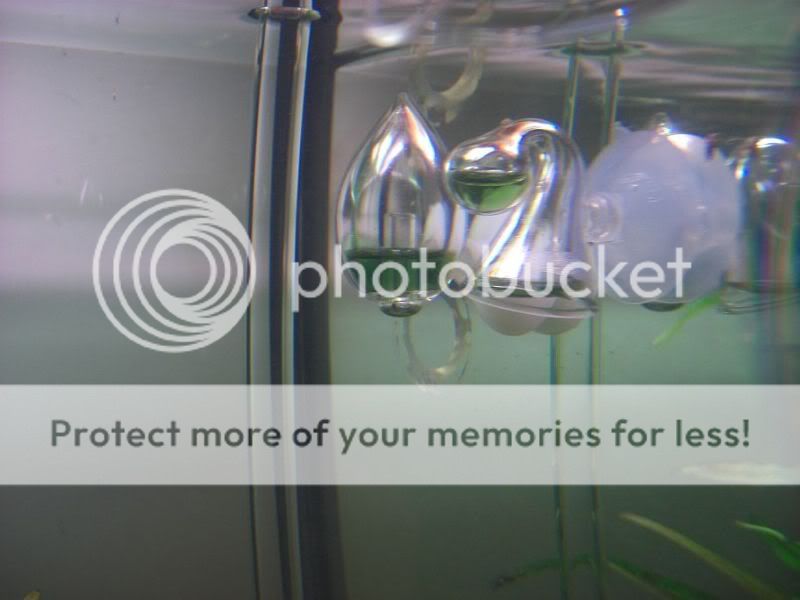
Finally we have the 2 drop checkers side by side which I will do a test on tomorrow to see which reacts quicker. Although you can see they are different colours this is not a fair test at the moment because the teardrop has 2ml in it and the Chameleon 1½ml 4dKH. I will put equal in them tomorrow and start a separate thread on the test.
DCs.jpg


So what do you think?

AC
 
Really nice new scape, I like the tapered effect towards the right. Combination of anubias and P halferi is effective too
 
I really love the new layout.

Where did you get the Boyu inline diffuser ? Im thinking of getting one myself

Steph
 
Just an updated pic that I took. Came out quite well so I thought I would put it on:

fullfront-4.jpg


AC
 

Most reactions

Back
Top