Aqua One 1500R Light Unit

The December FOTM Contest Poll is open!
FishForums.net Fish of the Month
🏆 Click to vote! 🏆

Hi rust and bodge,

I seem to be having similar issues with the light units on the 1500r ive just been given. One blew out before i got it (guy thought bulbs had popped) so did i until i put new bulbs in today and got nothing!

And now the 2nd unit, which would randomly turn off will now no longer come back on!

My questions are is this easy enough to do and what did u use to open up the units to acces the ballast?

Cheers!
 
Hello,
 
As you have the same unit as Kirky1986, it might be an idea to PM him directly.
I've personally had to cut open some units, some others I've been able to "open", (with a little force!).
 
The job of replacing the ballast is actually the easiest part!
 
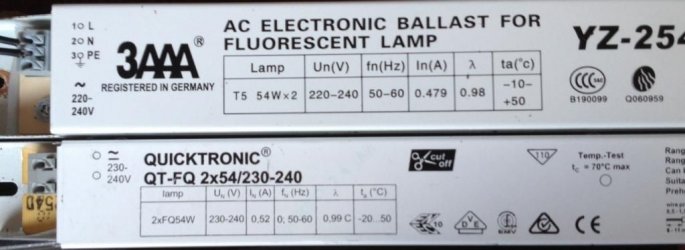
If you need any help with the ballast replacement and wiring, then just post here.. A picture or two showing the ballast schematic/model number and ballast terminals would be helpful. Also, could you confirm the tube ratings (e.g. 2x35W T8).
 
Good luck!
 
Bodge99.
 
Hello,
 
Sorry... should be: "As you have the same unit as R7UST..."
 
Bodge99.
 
hi
 
thanks for the reply!
 
as you say its the same as r7ust's tank so its 2x54w t5 lights.
 
i only got the tank at the weekend and the previous owner said that a couple of the bulbs (on one unit) had started to fail then stopped all together.
 
so i ordered 2 new t5 54w for them put them in and got nothing, so i put them in the light unit that at the time was working - but it had gone of randomly a couple of times - put the new bulbs in and everything was fine until a couple hours later when thy just went off and still havent come back on.  
 
the first few times i tried to get them working again like i had done previously but all i got was a flicker then of again.
 
ive ordered a ballast similar to the one you suggested to r7ust for 2x54w bulbs only thing ive justnotice is that it doesnt have a size on 
noexpression.gif

 
only cost £10 quid so fingers crossed!
 
Hello,
 
One possible "gotcha" is how your hood is wired... There are two main ways of doing this and I wouldn't like to guarantee that hoods/units for the same make/model of tank are identical.
 
Basically it depends on how the tube sockets are wired. These can have either one or two wires per socket. You can only tell by opening the unit up and looking. (**DON'T** play with a multimeter on a ballast that has been recently powered up, working or not!).. A variation on this theme is that some aquarium manufacturers wire the hood to suit the specific ballast used...  some ballasts have 8 connections, some 7... all the way down to 3 (all for 2 tube use).. Wires may be joined together in an "economical way". As before, the only way to tell is to look and see.
 
If your sockets have one wire then you have to use a ballast that supports this.. (a cold cathode type ballast).
 
If your sockets have 2 wires then you can use any ballast (hot or cold cathode type) that is rated for your tubes (for the number of tubes, tube length/power rating and diameter. This is given by (example) 2x30W T8. It is important that all specifications are met as closely as possible. This is to ensure maximum ballast and tube life. You cannot (normally) use a ballast that is designed for a T5 tube on a T8 (example). I personally would be wary of a ballast that is sold as supporting both types (without seeing the manufacturers ballast datasheet).
 
Be aware that ballast manufacturers don't normally describe ballasts as hot or cold cathode types... this is because there is a special type of tube (not used by us) that has no heaters/filaments. Ballasts for these are often called "cold cathode".
 
The design of both types of cold cathode ballast are similar in principle... but **are** different.
 
The ballasts that we use are described thus:
 
Cold cathode (our sort!): Instant start, fast start, quick start or even cold start etc.
Hot cathode: Warm start, preheated start... etc.
 
Some marketing departments describe hot cathode ballasts as "fast start" etc. and there are types of hot cathode ballasts designed to work in very low temperatures... yes! called "cold start ballasts".... Confusing sometimes!!
 
The only way to be sure is to examine the ballast wiring diagram/schematic...
 
Sorry to go on a bit... but I do find this stuff interesting!
 
I suggest that you open your unit up and have a look... If you could post a picture or two here, then I'll confirm exactly what you have... BTW, which ballast did you actually buy??
 
Bodge99.
 
Hello,
 
Your new ballast is a 6 terminal (ignoring the mains connections) hot cathode ballast. Two of the tube wires are connected together and then connected to the relevant ballast terminal.
 
If it does turn out that your hood is actually wired as a cold cathode type (I think that you'll be O.K.) then please don't just "suck it and see" by trying to connect it up..... It might work for a short time, but the ballast **will** fail very quickly.
 
If you want any further help or have any questions at all, then just post here..
 
Bodge99.
 
Hi bodge!

New ballast came today! And just managed to get the old on out! Looks like theres a bit of moisture! Not loads though! Ill dry it out and reseal the whole unit afterwards!

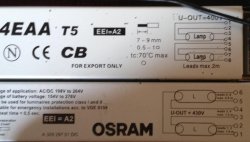
Heres a couple pics of the new and old ballast! The wires arent colour coded!
 

Attachments

  • image.jpg
    image.jpg
    50.9 KB · Views: 218
  • image.jpg
    image.jpg
    60.3 KB · Views: 111
Hello,
 
Glad to see that you have your new ballast...
 
You have the "best of all worlds" with respect to the wiring, each tube pin is connected to an individual wire, each of which has a unique presence at the ballast (i.e. no wires connected together.... often out of easy reach etc.). This means that you can use any ballast that is rated for your tubes **without** having to rewire/extend anything. All you need to do is to make one (or more) external (to the ballast) connections.
 
Right... to work...
 
You can connect the new ballast up this way:
 
Old ballast               New ballast
    1                                  6
    2                                  5
    3                                  *
    4                                  4
    5                                  *
    6                                  3
    7                                  2
    8                                  1
 
 
* Connect these wires together. Use an insulated connector block or solder them together and use heatsink tubing to insulate them (I normally use 2 lengths, one on top of the other.) **PLEASE** don't just use insulating tape... It **WILL** sweat off...
 
Make the connections... Test them for robustness by **gently** tugging them.
 
Test the unit by placing it on the floor and plugging in... Don't forget any inline switch! Leave it going for about an hour and then switch off and UNPLUG!
 
Check the ballast casing for excessive heat... Assume it is red hot (better to assume it's hot when it isn't.. rather that then getting burnt by something that you think is cool). You will probably find it is slightly warm.
 
If all is well... Job done!!  Well done!! now seal up the unit and refit to the tank.
 
Any problems at all.... just post here.
 
Good luck!
 
Bodge99
 
Bodge you are a HERO! Just save me tons of cash!

Just roughly put it all together (need to find a terminal block) so dont worry about the insulating tape! :p

Waiting for the silicon to come too so fingers crossed that comes tomorrow! Then ill see how much cash the wife says we have left as to whether i order another ballast for the other unit!

Thanks again
 

Attachments

  • image.jpg
    image.jpg
    15.8 KB · Views: 96
Hello,
 
Happy to hear that all is good...
 
Just pleased that I could help.
 
BTW, I've had a few emails from people (another this evening), asking why I offer and give technical help on sites such as this for no financial reward..
 
I personally like giving help where I can. This stuff (along with experience with building/rebuilding tanks) is/are about the only things (fishwise) that I can "give back" to this community. I do enjoy finding cheap(er) solutions to potentially expensive problems!
 
May your lights be forever flicker free...
 
Regards,
 
Bodge99.
 
Hello,
 
Just for completeness... I've just realised that I made an error in post No. 22 of this thread.
 
I wrote "Your new ballast is a 6 terminal (ignoring the mains connections) hot cathode ballast. Two of the tube wires are connected together and then connected to the relevant ballast terminal."
 
This should have been:
 
"Your new ballast is a 6 terminal (ignoring the mains connections) hot cathode ballast. Two of the tube wires are connected together, these wires are not then connected to any ballast terminal".
 
This might make things clearer for anyone else following this thread.
 
Bodge99.
 
Well im glad you were here to help me!

Just reading through some of your replies and one mentions hot and cold cathode ballasts, i take it that from my photo both of mine are the same type as u warned about a quick and certain failure?

As i said im gonna get hold of a terminal block today then test it for a couple hours to see how it goes! Then hopefully seal it back up!

Thanks again

Chris
 
Hello,
 
You have no worries...  both of your ballasts are hot cathode types... I would have warned you if you were running into problems, or taking any risks (i.e. DON'T DO IT!! etc.).
 
FYI. A fluorescent tube (more properly called a fluorescent bulb... I prefer "tube") has two small heating elements at each end of the tube (often called filaments). These are electrically isolated from each other and are connected to the pins on the tube ends.
 
A hot cathode ballast works in the following way:
Power is applied to the heaters, which start to glow (this is where the name "preheat" comes from). The heaters start to emit electrons (in the same way as a 1920's "bright emitter" radio valve). A voltage is applied across the tube (from end to end), this voltage forces the electrons to travel from one end of the tube to the other.... The tube has "struck" or started...
 
A cold cathode ballast works slightly differently.
The heaters are not preheated. A high voltage pulse is applied across the tube ends.. This high voltage pulse forces electrons to be emitted, which are attracted from one end of the tube to the other. The tube has "struck" or started.. The heaters do glow... but this is due to electron flow in the tube... not to any heater pin to pin circuit. This is how a cold cathode ballast can work with only one connection per tube end.
 
Now, what happens in the tube is the same with both types of ballast. The tube contains a small amount of mercury (to help with this process) and a mixture of gases at low pressure. Moving electrons impact gas and mercury atoms.. causing them to ionise (the atoms "take up" energy, an "excited" energy state.). This energy is released in the form of UV light. This UV is converted to visible light by the phosphor coating placed on the inside wall of the tube. The exact chemical makeup of this coating dictates the colour spectrum of light emitted.
 
Now the ballast "running" output is AC. Electronic ballasts run at high frequency. This is why you don't see the traditional 50Hz (cycles per second) or 60Hz (US mains frequency) flicker that you can get with traditional magnetic ballasts. Some people are very sensitive to this.. I am. Some shops/stores have lighting powered by really cr@&&y ballasts.. the flicker often makes me feel ill!
 
The main job of the ballast is this. As the tube begins to emit light, the resistance of the ionised gas mix begins to decrease... This would otherwise mean that the current flow in the tube would increase... a "runaway" effect. The ballast limits the current flow to a safe level. Too high a current flow and the tube would be destroyed.
 
This is one of the main reasons that the ballast has to be matched to the tube size and power rating..
 
Further advantages of electronic ballasts are:
 
Lower overall power consumption and running costs (more efficient).
 
Monitoring of tube operating conditions. (automatic switchoff if any "out of spec" conditions detected). This is often the cause of peoples puzzlement when their lights either don't switch on at all or switch themselves off after a short time.
 
EOL (end of [tube] life) detection. A failing (ageing or "worn out") tube can overheat... This, with a magnetic ballast, can melt the tube sockets or even the tube glass. It is potentially a fire risk. Tube sockets should be made from "self extinguishing" materials... some are not!). The ballast will refuse to strike under these conditions.
 
One last thing... The reason why you see many more hot cathode ballasts for sale than cold cathode types is because magnetic ballast systems are, by definition, 4 wires per tube circuits.... 
Replacement or upgrades therefore are often hot cathode types. This makes replacement easier to do... No "spare" wires to worry about!
 
You will also come across various hybrid types. Some of these are truely horrible "things"!
 
See, I told you that I was "full of it"!
 
Regards,
 
Bob (aka Bodge99).
 
Well i understood some of that! Im more a computer guy than an electrics guy but i understands bits and bobs!

The light was in for an hour before i turbed it off and checked for excessive heat, it was fine!

So gotta wait for this damned silicone which was posted on wed so shouldnt be too long!

The fish look lost without having a light on at night

Chris (kirky)
 

Most reactions

Back
Top