Rena Aqualife 450 With Diy Backdrop - 1st Tank.

The December FOTM Contest Poll is open!
FishForums.net Fish of the Month
🏆 Click to vote! 🏆

HappyGeorge

Fish Herder
Joined
Nov 1, 2008
Messages
1,158
Reaction score
0
Location
Kent, England
So I finally have the time to get started on my project.

This is my first ever tank and I want to take my time and make a decent job of it.

The equipment is a Rena Aqualife 450 aquarium with a Fluval FX5 and a U4 and 2 x 200w heaters.

The plan is to keep Malawis and to focus on algae eaters and to go for medium aggression specimens I have no plans to run any breeding at the moment but will let nature take its course in the tank.

I originally bought 3 x juwel rock 3D backdrops for this tank but I didn't like the way they joined together or the fact that I would have to cut them to get them in. This is because the Rena has bracing pieces that dont have the clearance to get the juwel pieces in.......my first newbie error.

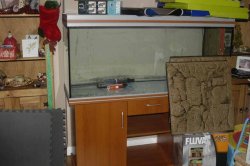
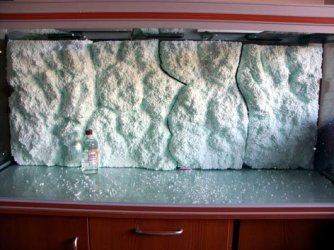
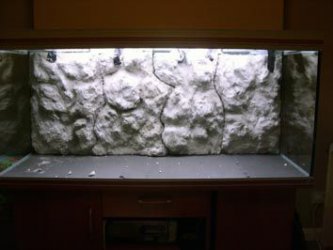
As you will see from the photo I have had it since before Christmas and the tank is clearly used (ex-display) but it is now clean and ready for action.

The plan is to have a lot of rock work in there and rather than eggcrate I am planning on using the stuff you can see in the bottom left hand corner of the photo which is shock absorbant matting designed for use in machine workshops. A nice alternative as it is nice and thin easily cut to size and cheap at £12 for enough for the whole tank.
 

Attachments

  • project_1.jpg
    project_1.jpg
    54.3 KB · Views: 348
So I have taken a few days off work and have managed to start on the backdrop.

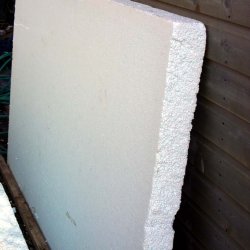
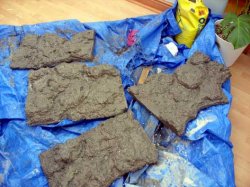
Started by doing a test piece of polystyrene coated in cement and found that the natural cured colour of the product was very similar of that of the limestone Kentish ragstone that I'm going to use in the tank.

I managed to pick up some large pieces of polystyrene from a mate who had originally bought them to replace those in the llid of his hot tub but they were too thick.
 

Attachments

  • project_2.jpg
    project_2.jpg
    77.5 KB · Views: 310
I had spent some time looking on the internet at the other projects of this type and many had used the technique of using 2 thin pieces of polystyrene and making rock shapes out of one in order to stick on the other.
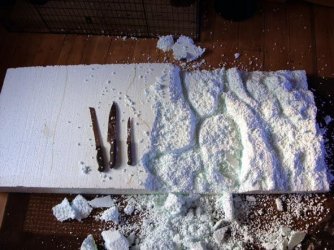
Many of the ones I saw looked a little false and I personally had much better results from just hacking at a thicker piece and was happier with the random manner in which pieces decided to break off than when I tried to create my own rock shapes.

So having decided on my method I then:-

1) Cut a single piece from the large sheet in the same size as my tank using a standard medium toothed woodsaw.

2) Mark out on the sheet a rough guide of where I would need to cut the sheet in order for it to fit between the bracing pieces on the tank. I wanted to make my cuts at random angles and not in a straight line in order to try and disguise the joins once fitted.

3)Start hacking away. I used a carving knife and a bread knife. I also had on hand a steak knife which I knew if buried up to the hilt was about 4" which gave me a guide to how deep through the poly my cuts were travelling.

Please note this part is super messy the stuff gets everywhere luckily my Mrs was at work when I did this bit the dog helped by laying in the waste poly spreading it to every corner of the house. It also clogs the hoover pretty quick so don't burnt the motor out.
 

Attachments

  • project_3.jpg
    project_3.jpg
    86 KB · Views: 350
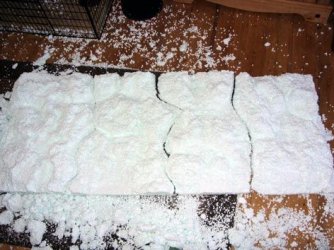
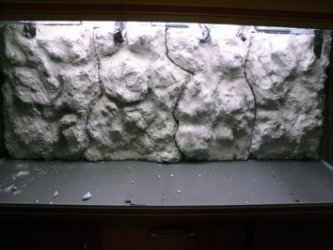
So here is the finished article had to shave a little off one end to get it into the tank but it makes no odds at this stage.

and in the tank.
 

Attachments

  • project_4.jpg
    project_4.jpg
    64.7 KB · Views: 319
  • project_5.jpg
    project_5.jpg
    59.3 KB · Views: 300
Looking good.. What is the next stage?, and when is this happening?. :shifty:
 
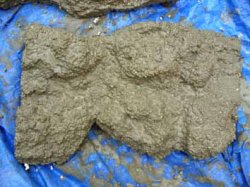
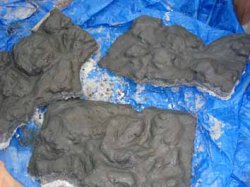
Next stage is coating the whole lot in cement. You will need a bag of cement and some sand (I used playpit sand) - a bucket - a paint brush - and either some garage space or a conservatory and an understanding wife.

I mixed up a fairly runny (like thinnish wallpaper paste or custard) batch of cement with about 1 part sand to 4 or 5 cement but I only mixed about a third/half of a bucket which was enough for 2 pieces of the backdrop.

Then it was just a case of painting it onto the poly and trying to get a good covering.

This is going to need a thicker coat next to remove some of the bobbly poly look particularly as I used the stuff with the very large poly balls. Some people have used a hot gun to melt the poly and make it smoother but I decided I preferred to leave some of the bobbly look. That and hot poly indoors is bad news and without a quality mask or extraction system the fumes are extremely unfriendly.
 

Attachments

  • project_011.jpg
    project_011.jpg
    56.6 KB · Views: 332
  • project_015.jpg
    project_015.jpg
    40 KB · Views: 296
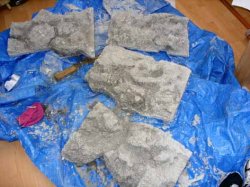
After 24 hours of drying they have a more limestone colour - I am currently looking at the possibility of colouring a final coat to a darker grey/black for some lowlights on the rocks. Although once lit in the tank natural shadow given by the light from above and surrounding rockwork may be enough?
 

Attachments

  • project_12.jpg
    project_12.jpg
    48.5 KB · Views: 311
Nice work on that background :good: Probably saved yourself a small fortune against the commercial ones available and it looks just as good.
 
Thanks for the possitive feedback will be doing another coat at the weekend so will post photos and a blow by blow account when Im done.
 
Okay next stage done.

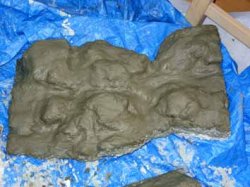
Made up a thicker batch of cement 1 part sand to about 3 cement and thick enough that I had to smear it on by hand. With the benefit of hinesight it may have been a good idea to have wet the previous coat with a spray as when I applied this layer a lot of moisture seemed to be drawn out of it. I combatted this by brushing the coat over with water when I had finished this also served to remove the finger marks in it and to ensure it had got into all the nooks and crannies.

Have also stumbled across some coloured swimming pool grout which I may use to colour the final coat.

Am also planning to cure it in the bath many people seem to cure them in the tank which seems odd to me - all those needless water changes when you could just leave them in the bath or even out in the rain? Cured is cured doesn't need to be in the tank just need to do a ph test on a bath full.
 

Attachments

  • project_017.jpg
    project_017.jpg
    34.8 KB · Views: 302
  • project_018.jpg
    project_018.jpg
    36.4 KB · Views: 310
The thick coat has dried so decided I should put it in the tank and see how it looks - the black you can see is pieces of tape holding the pieces from the top. Also looking at doing the final coat using lime free cement and using black plastic shreddings in the mix as a texture/colour change.
 

Attachments

  • project_022.jpg
    project_022.jpg
    32.8 KB · Views: 317
  • project_023.jpg
    project_023.jpg
    37.7 KB · Views: 297
Thanks very much means a lot to have approval of more experienced people once completed I will give a total cost (at the moment under a tenner) and hopefully some more people will have a go. Have made a change of plan and having put it in the tank and lit it I am going to get some Snowcrete (a white cement powder) and mix it with the normal grey to make a lighter mix for highlights and to bring it closer to the colour of limestone when it is wet i.e underwater.
 
Sorry for anyone who was following this had a few things going on including looking at moving house so the fish tank ended up on the back burner.

Now completed the next phase mixed up 2 part snowcrete (white cement) and 2 part mastercrete with 1 part play sand to make a much lighter mix and then stippled it onto the high points of the background with a brush then mixed up a darker mix 1 part sand to 5 parts mastercrete and did the low points and deep holes and caves so now 3 shades of grey.

Having left it to cure I then washed it down with a hose thoroughly to try and reduce the amount of cement dust going into the tank.

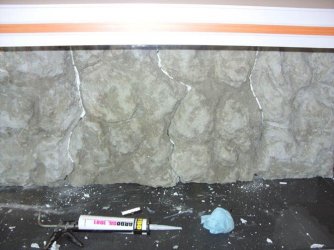
Then fitted it into the tank using copious quantities of aquarium safe silicone and secured it with tape the picture shows it the next day when I have filled the gaps between the pieces using small wedges of polystyrene

fitted_1.jpg
 
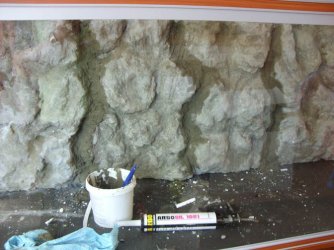
Next stage was having plugged all the biggest gaps to mix up some more mix and smear it into the gaps where the pieces join. Picture here shows it wet and the following post shows it dry. At this point it still needs some more mix in the cracks and some more colour deviation at the joins but think its all but there. Never know if we decide to give up on moving it may even get some fish in it by Christmas???

fitted_2.jpg
 

Most reactions

Back
Top