Juwel 3D Backgounds

Marky Boy

New Member
Joined
Jan 25, 2011
Messages
6
Reaction score
0
Chaps,

Just a quick novice question hopefully someone can answer for me.

I have ordered this Juwel 3D background for my 30" tank, which is currently empty/dry.

Clicky

Do I have to Silicone this in place, or can I just tightly trim and wedge it into place?

If I do have to Silicone it into place, do I have to seal it all the way round, or can I just attach it with a couple of blobs at the back.

I am just trying to factor in that since the background is flat at the back there shouldn't be any space for fish to get behind it. Also if I don't use Silicone I can remove it if required?

Any help would be appreciated.

Thanks,

Mark
 
I had to remove mine, brecause one side came un-siliconed and floated up... :( Shame because it looked great.

But, If i was to refit it at some point I would, like you say:

Make sure that there are absolutely no gaps at the top bottom or sides where fish can get in. Even under the substrate. In fact, I would consider running silicon round all the edges and joins if I did it again.

Use plenty of silicon (aquarium specific) and leave it 48 hours to dry.

You can always remove it, the silicon will just be pulled off when you want to remove it, afaik.
 
Cut to size and check
Clean the glass with acetone
Silicone all 4 sides on the rear and the 3 sides on the front of the background
Place in tank
Leave 24 hours to dry
Silcone the sides you can reach
Leave for 24 hours
clean with a razor blade any undesirable parts
leave for 24 hours
Good to go

The reason is mainly to prevent fish getting stuck behind.
 
Just my 2p's worth, I would leave the background in some water for 2 weeks before fitting it.

The reason being is me and 2 of my firends both bought the 3D background from different places and after 3 weeks the paint started to flake off to the point where there was no colour left. I spoke to the people I bought it from and they said they have had loads back with the same problem and Juwel said its because of a faulty batch of paint.

So I then had to remove it all, get a replacement and re fit it all which was obviously hard work with the tank populated.

Jay
 
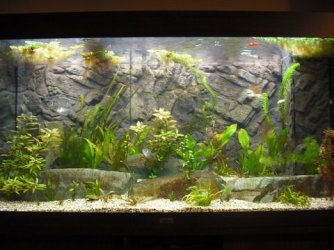
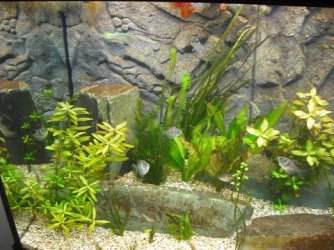
i would advice that you fit it higher than your waterline as it looks annoying if it's slightly lower, i made that mistake. its annoying as the bottom is under 5-6" of gravel

its a shame there has to be joins though
 

Attachments

  • tankpi2.jpg
    tankpi2.jpg
    42.8 KB · Views: 30
  • tankpic4.jpg
    tankpic4.jpg
    57.6 KB · Views: 40
i would advice that you fit it higher than your waterline as it looks annoying if it's slightly lower, i made that mistake. its annoying as the bottom is under 5-6" of gravel

its a shame there has to be joins though

Good shout, and I know what you mean about the join. I'm going to try and use plants and other decor to hide it. It's not the end of world though. Your tank looks really nice by the way :good:

I think my current plan is I'm going to fit them very tightly up against the upper lip on the tank, and all the way round the sides and not use silicone. I will keep it like this while I cycle the tank.

At least then If the paint fails on the background, or I don't like it I can easily remove it.

Thanks for the help guys. I'm still pretty new to this so expect plenty more questions to be forthcoming.

Once I get all my stuff together and actually start putting it all together I'll start a thread with all the pictures.


Mark
 
Join in a zigzag eratic way with interconnecting joints and plant with patches of moss it will make it harder to see the joins. You could use a vine type plant to crawl over the background.
 

Most reactions

Back
Top