Building 75G Stand

James_R

New Member
Joined
Jun 28, 2024
Messages
8
Reaction score
15
Location
New Jersey
Hi everyone,

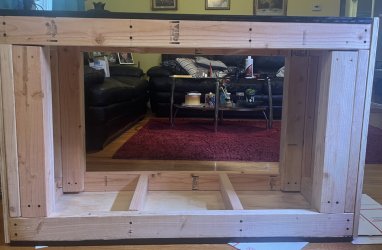
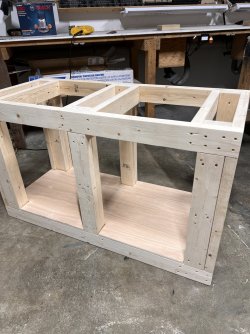
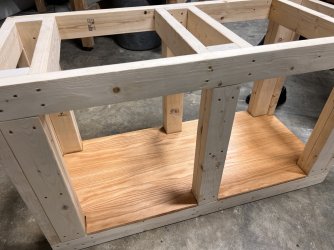
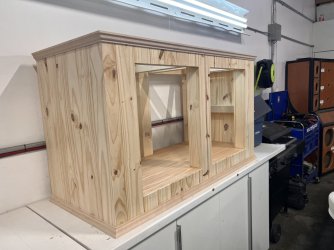
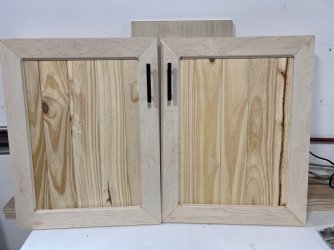
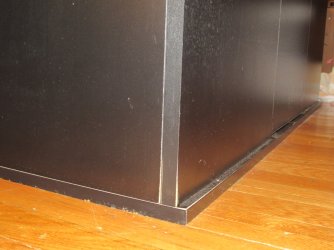
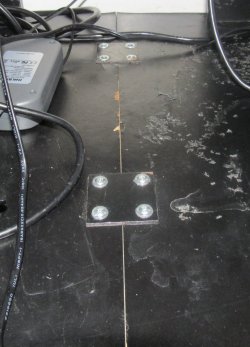
I have a 75-gallon Aquatic Fundamentals aquarium stand that recently suffered some damage due to a leak from my Sunsun canister filter yesterday. I've had this stand for a year and have been using a composite shim on the top left corner of the bottom of the stand for stability. Additionally, I modified the stand by drilling two holes on the top to plug the bottom aquarium holes with a bulkhead.

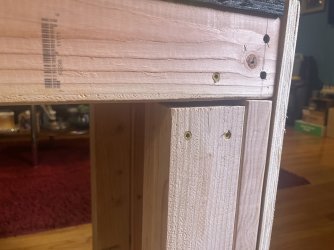
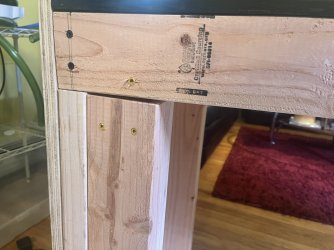
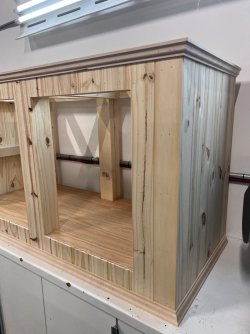
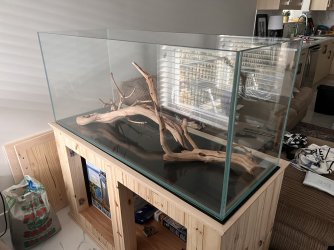
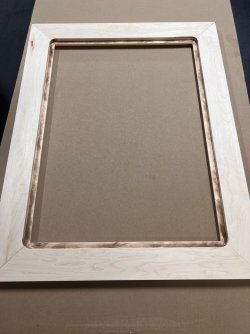
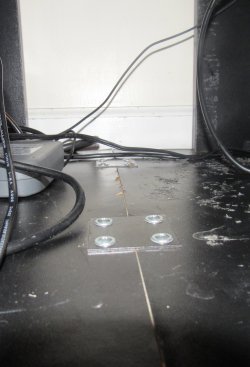
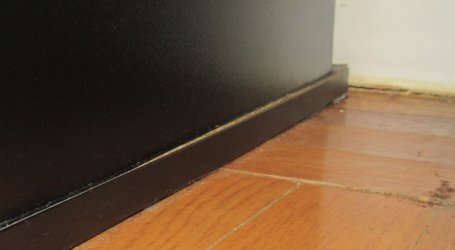
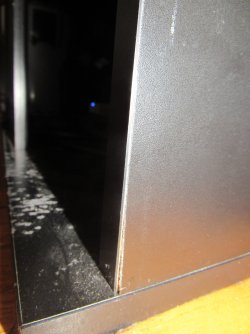
Now, I've noticed that the particleboard of the stand is damaged on the base and legs. Specifically, the side leg where the shim is located seems slightly sunken into the base, or the base is warped around it (Images 4 and 5)
 

Attachments

  • 31545760_Unknown.JPG
    31545760_Unknown.JPG
    268.9 KB · Views: 61
  • 31546256_Unknown.jpg
    31546256_Unknown.jpg
    205.5 KB · Views: 34
  • 31546240_Unknown.jpg
    31546240_Unknown.jpg
    98.7 KB · Views: 40
  • 31546208_Unknown.jpg
    31546208_Unknown.jpg
    125.1 KB · Views: 34
  • 31546192_Unknown.jpg
    31546192_Unknown.jpg
    217.8 KB · Views: 29
  • 31546176_Unknown.jpg
    31546176_Unknown.jpg
    286.9 KB · Views: 29
  • 31546160_Unknown.jpg
    31546160_Unknown.jpg
    151.3 KB · Views: 41
  • 31546144_Unknown.JPG
    31546144_Unknown.JPG
    138.2 KB · Views: 36
  • 31546128_Unknown.JPG
    31546128_Unknown.JPG
    169.2 KB · Views: 30
  • 31546064_Unknown.JPG
    31546064_Unknown.JPG
    237.9 KB · Views: 29
Unfortunately, the amount of damage is case by case. I don't know what genius decided particle board would be a lovely material to make stands from, but almost all such stands get swelling somewhere. Some are fine, some have short working lives. I'm afraid a photo doesn't say a lot, and we're on our own evaluating the safety of these things. They hold a lot of weight.

I'm a bit of a cowboy when it comes to stands, and have never had a water damaged one collapse. That said, I no longer have any composite material stands for tanks. I don't deeply trust them brand new.
 
I have had a “saw dust” stand fail, when I had tanks before… it didn’t drop the tank, before I got it drained, but I will no longer use one… just seems bad juju, water and saw dust wood… I make my own now, almost exclusively… most with concrete block, and construction lumber…
The ones I built with n, in the basement, are going on 25 years old…
 
If a corner or a side of the support started to crush... I would go ahead with replacing the stand in the near future.

There is Ultra Moisture Resistant Particle Boards, and even that is not recommended.

I'm a big fan of lumber armature and wood plank for the finish and nice look or even plywood if look doesn't matter.

in the old days, I made all my cabinets because commercial ones are just too expensive for what they really are.

A well designed 2x4 stud stand. Once assembled and finished. The strength and rigidity I obtained was incredible.

If I where to get a large tank, I would make my stand again.
 
If the particle board component is covering a more sturdy and water resistant frame, then you should be ok. If it is the frame then I would look into/build a more structurally sound one out of 2x4, 2x6 depending on the size.
 
Thanks for the advice, I decided to build a new stand out of a 2x4 lumber frame, covered with sanded plywood, which I got cut to size from home depot yesterday. I will then stain it with a behr stain and poly all in one to become water resistant. I will start building it today.
 
If the particle board component is covering a more sturdy and water resistant frame, then you should be ok. If it is the frame then I would look into/build a more structurally sound one out of 2x4, 2x6 depending on the size.
It is the frame unfortunately.
 
It is the frame unfortunately.
Well, you maybe in for some structural issues in the near future. I would get an idea very soon as to what you want to do to replace the stand. Then what you're probably going to have to do is break this tank down temporarily and get it off of the stand and move the new stand in place and set the tank back up. In my opinion this is the best option to remove any stress of catastrophic failures in the future. You don't want to wake up to find the tank on the floor and your fish spread all over it.
 
The particleboard sides are attached with cam locks, I followed the instructions that came with that terrible stand and didn't use any glue.

I have completed most of the new stand and used wood glue and deck screws to create the 2x4 frame and attach the exterior plywood sides. Now I have to make and attach plywood cutouts to the front for the doors. I am going to attempt to create and design ADA-style doors for it with piano hinges. However, the frame has a small gap between 2 of the legs and the plywood top. These 2 legs are both on the same side and there are 6 more that are flush with the plywood top. 2 other legs are flush with the top on the same side and all 4 on the other side are flush with it also. Would this be a problem?

Also, I should be finished with it by the end of this week. As requested I will send pictures when done
 

Attachments

  • IMG_8412.jpg
    IMG_8412.jpg
    221.7 KB · Views: 19
  • IMG_8416.jpg
    IMG_8416.jpg
    256.2 KB · Views: 15
  • IMG_8417.jpg
    IMG_8417.jpg
    313.9 KB · Views: 17
  • IMG_8418.jpg
    IMG_8418.jpg
    313.4 KB · Views: 19
Looks good. I would fix the legs with gap but that is because I am anal when working wood. Trim will both hide the mistake and tie things together regardless.
 
This was my stand I built for my 75 gallon tank
 

Attachments

  • IMG_6653.jpeg
    IMG_6653.jpeg
    419.3 KB · Views: 15
  • IMG_6654.jpeg
    IMG_6654.jpeg
    347 KB · Views: 15
  • IMG_6729.jpeg
    IMG_6729.jpeg
    409.4 KB · Views: 18
  • IMG_6719.jpeg
    IMG_6719.jpeg
    396.9 KB · Views: 17
  • IMG_6765.jpeg
    IMG_6765.jpeg
    238 KB · Views: 14
  • IMG_6766.jpeg
    IMG_6766.jpeg
    244 KB · Views: 17
  • IMG_6771.jpeg
    IMG_6771.jpeg
    379.4 KB · Views: 14
  • IMG_7062.jpeg
    IMG_7062.jpeg
    319.5 KB · Views: 13
  • IMG_7036.jpeg
    IMG_7036.jpeg
    234 KB · Views: 14
  • IMG_7035.jpeg
    IMG_7035.jpeg
    241.8 KB · Views: 13
  • IMG_7022.jpeg
    IMG_7022.jpeg
    224.1 KB · Views: 15
  • IMG_7023.jpeg
    IMG_7023.jpeg
    271.3 KB · Views: 13

Most reactions

Back
Top