Koglin
Fish Crazy
Anyone got home made Gadgets?
Since getting back into the hobby after a few years, I find myself creating random gadgets to help with tank stuff.
And I wanna know what other stuff you all might have concocted!
Here's what I've made (pics at bottom) that I find myself using regularly (excluding weird stuff I've done with the dremel to carve holes/cavities in driftwood):
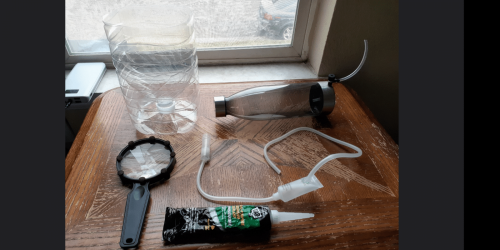
I use a water gallon jug cut in half for brine shrimp, along with a portable AA battery air pump (in a different pic) and a magnetic clip on mini led light that is normally on my nano tank.
I also got a cheap magnifying glass and a pack of small felt pads to put on the plastic rim (both sides to switch between magnification) so I can inspect my critters (eventually I want one of those cool magnetic ones but this works for now)
My drip acclimater is a water bottle ($1 at walmart) that has a small cavity in-between the metal base and the bottom of the plastic bottle, so I removed the metal bottom and drilled x2 holes to run a small piece of airline through it (siliconed on both ends for water seal/hold) and an airline valve on the end to control water flow speed. To control excess air bubble production I use some thread tape for a better seal on the valve knob.
Next, I made a tiny vacuum (actually works) for my nano tank, as my bladder snails go poop A LOT (species only). It's a small plastic tube with an airline ran through and a sponge for filter (prevents my snails from getting sucked up, it's pretty strong for its size). Then I ran that air line through a small (and thoroughly rinsed) hotel shampoo bottle to act as a bladder, and yet another airline out the back of the bottle for drainage. Siliconed together.
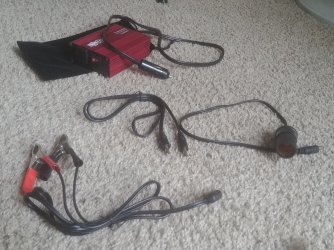
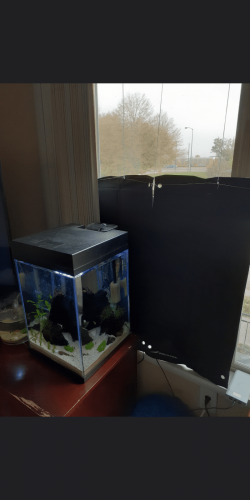
When my 10 gallon tall was getting too much sunlight through the blinds for good temp. regulation, I took my old backpacking solar panels and hung them in the window with a hangar and bankline attached to screws to block out the sun (worked), 1 charges a battery bank that I use for my nano tanks clip on led light and a usb air pump in case of emergencys, and the other I use to charge my console game controllers.
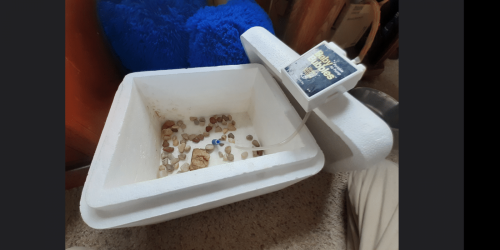
Lastly, is just my old bait box for fishing with minnows. It's a styrofoam box my grandpa gets his insulan in the mail with, I just popped a hole big enough to hold the airline and pump clip. Now days this is a quarantine box for plants and drip acclimation and I usually use the usb air pump (used it to rinse some rocks the other day, they're still in there -.-')
For all projects, I use Dap's aquarium safe silicone from ace hardware and let it set for 36 hrs before testing stuff. If only I had taken pics of my failed projects lol - you would all think I'm insane.
And that's it!
So how about you all?
Since getting back into the hobby after a few years, I find myself creating random gadgets to help with tank stuff.
And I wanna know what other stuff you all might have concocted!
Here's what I've made (pics at bottom) that I find myself using regularly (excluding weird stuff I've done with the dremel to carve holes/cavities in driftwood):
I use a water gallon jug cut in half for brine shrimp, along with a portable AA battery air pump (in a different pic) and a magnetic clip on mini led light that is normally on my nano tank.
I also got a cheap magnifying glass and a pack of small felt pads to put on the plastic rim (both sides to switch between magnification) so I can inspect my critters (eventually I want one of those cool magnetic ones but this works for now)
My drip acclimater is a water bottle ($1 at walmart) that has a small cavity in-between the metal base and the bottom of the plastic bottle, so I removed the metal bottom and drilled x2 holes to run a small piece of airline through it (siliconed on both ends for water seal/hold) and an airline valve on the end to control water flow speed. To control excess air bubble production I use some thread tape for a better seal on the valve knob.
Next, I made a tiny vacuum (actually works) for my nano tank, as my bladder snails go poop A LOT (species only). It's a small plastic tube with an airline ran through and a sponge for filter (prevents my snails from getting sucked up, it's pretty strong for its size). Then I ran that air line through a small (and thoroughly rinsed) hotel shampoo bottle to act as a bladder, and yet another airline out the back of the bottle for drainage. Siliconed together.
When my 10 gallon tall was getting too much sunlight through the blinds for good temp. regulation, I took my old backpacking solar panels and hung them in the window with a hangar and bankline attached to screws to block out the sun (worked), 1 charges a battery bank that I use for my nano tanks clip on led light and a usb air pump in case of emergencys, and the other I use to charge my console game controllers.
Lastly, is just my old bait box for fishing with minnows. It's a styrofoam box my grandpa gets his insulan in the mail with, I just popped a hole big enough to hold the airline and pump clip. Now days this is a quarantine box for plants and drip acclimation and I usually use the usb air pump (used it to rinse some rocks the other day, they're still in there -.-')
For all projects, I use Dap's aquarium safe silicone from ace hardware and let it set for 36 hrs before testing stuff. If only I had taken pics of my failed projects lol - you would all think I'm insane.
And that's it!
So how about you all?
Attachments

Last edited: