Rear Rock Wall With Caves

davereap

New Member
Joined
Feb 20, 2010
Messages
19
Reaction score
0
Location
Ashford.. Kent
After seeing a number of other builds I wanted to design my own.

Requirements .. two large caves.. a planting trough... a multicave wall with small openings and a cover to hide a filter intake pipe.

To make it I am using a polystyrene material called depron, it comes in sheet form and I used 6mm thick sheets.
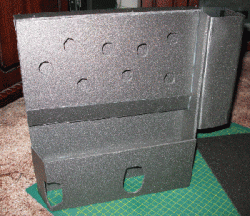
The structure is a number of box shapes, wide and deep at the bottom, narrower at the top.
The design is glued together with a hotmelt glue gun.
Entrance holes are cut into the boxes
 

Attachments

  • IMG_1559.gif
    IMG_1559.gif
    73.4 KB · Views: 172
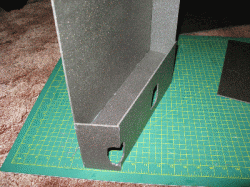
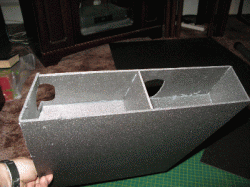
here the back has been cut to size and a lower box fitted to make two large caves

and seen from below
 

Attachments

  • IMG_1561.gif
    IMG_1561.gif
    92.8 KB · Views: 133
  • IMG_1562.gif
    IMG_1562.gif
    81.3 KB · Views: 144
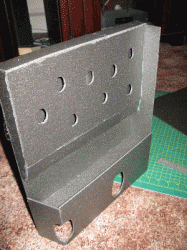
The top narrow box is now added, lots of small entrances, note the taper down to the planting trough, this is left open at the bottom to allow debris to fall through.. it also allows entrance from below for the smaller fish..

now a side cover to hide the filter intake tube
 

Attachments

  • IMG_1565.gif
    IMG_1565.gif
    98.3 KB · Views: 104
  • IMG_1566.gif
    IMG_1566.gif
    98.1 KB · Views: 107
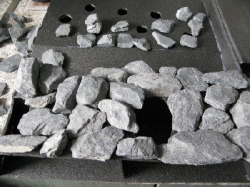
The process of adding the slate ... I used blue slate, washed it thoroughly and boiled it .. when dry it can be glued in place using a suitable aquarium silicone. Its like a large jigsaw puzzle, glue the slate to the background and to the other bits of slate and the structure will end up strong
 

Attachments

  • IMG_1573.gif
    IMG_1573.gif
    87.7 KB · Views: 144
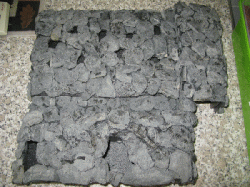
when fully covered and the silicone is set, trim out the entrances to make it look better... also trim any excess silicone that is showing
I then made a sepperate side pannel to cover the area under the pipe cover, and up the back wall between the main unit and the built in rear filter box
 

Attachments

  • IMG_1580.gif
    IMG_1580.gif
    93.3 KB · Views: 183
When you fit the sections it is advisable to restrain them to hold against the rear glass. I tied mine to the pipework and a sucker on the glass..This stops the wall falling away from the tank side

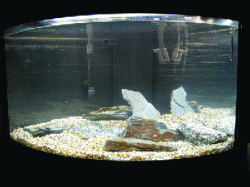
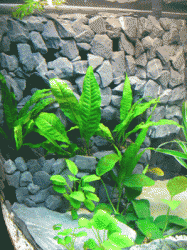
Here it is all finished, with plants as well
 

Attachments

  • IMG_1584.gif
    IMG_1584.gif
    74.5 KB · Views: 135
About half a bag of the slate was used to make the wall... cost £4.50/bag
One tube of silicone £6 and part of a depron sheet at £3.00/sheet...

for depron try your local aeromodelling shop. also craft shops sometimes have some

Other decor can also be made..

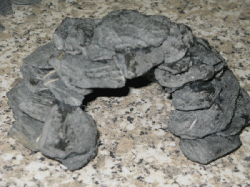
Here is a small cave.. make it on a depron base, then trim the depron away after everything is set..
Restraining walls for the gravel do the same...start with a depron or plastic base shape to what you want, curved, zizzag or straight, then build your wall.. or decorative structure.. your imagination is all that is needed
 

Attachments

  • IMG_1579.gif
    IMG_1579.gif
    89.8 KB · Views: 123
is the glue from the glue gun obviously ok? was there any kind in particular you used? or would aqaurium silicone hold this structure together?

oh and by the way... Thats excellent what you've done, definatly trying that one!

Thanks
Paul
 
Wow, I'm very impressed. I've seen fabricated walls from shaped polystyrene blocks glued to a back board and cemented but this is something else far more authentic.

You've definitely given me food for thought, I am planning for an upgrade to ~100g for CA/SA cichlids and I may well follow your lead.

Does this depron material fold okay? Or does it need to be cut into flat pieces to form 3D shapes before being glued?

Edit: I have seen other examples of depron's use in modelling from google searches, very bendy indeed!
 
One word.......excellent!

Well thought out and an extremely usable thing to have.

Shows clever thinking by anticipating muck collecting at the bottom of the smaller caves and providing an escape slot which not only allows it to fall out but straight into a planted area......brilliant :good:
 
darn, i need imagination, lol.

but i love the idea, i should try one for my 130 gall, what are all the small holes in the top part for?
 
thats brilliant! How much did it cost all in all, if you don't mind me asking.
 
thats brilliant! How much did it cost all in all, if you don't mind me asking.

Already mentioned:

"About half a bag of the slate was used to make the wall... cost £4.50/bagOne tube of silicone £6 and part of a depron sheet at £3.00/sheet..."


So about £13.50 with half a bag of slate and some depron left over!
 
^^cheers for that. Davereap i have the same tank and if i had known about this i'd have done something like this myself, rather than spending £50 on a juwel background. Have you any full pics of the tank?
 
how does the whole structure attach to the back of the aquarium?
the only thing i can think of is silicone. but i wouldn't personally like to silicone anything to the back of my tank, it makes a right mess. i have always wanted to make my own '3d' style back ground but always come to an end when it comes to securing it to the tank, i know slate isn't a light material, and that structure would be heavy at the top and therefore the possibility of it toppling over an obvious risk, if you attached it another way then id like to know how so i can do my own!!
 

Most reactions

Back
Top